Step anchor is broken
What "broken anchor" means
Each tooltip and tour step is anchored to a specific DOM element. Zenstep identifies that element using a fingerprint — a set of signals recorded when you created the step (element tag, class names, text content, position in the DOM, etc.).
If the page structure changes after you record a step, Zenstep may no longer be able to find the target element. When this happens, the step's health status shows as Degraded or Broken in the dashboard.
| Health status | Meaning | | ------------- | ---------------------------------------------------------- | | Healthy | Element found reliably | | Degraded | Element found but with lower confidence — might break soon | | Broken | Element not found — step will be silently skipped |
A broken step is silently skipped rather than showing an error to your users. This prevents broken tooltips from appearing on screen, but it does mean affected users miss that step.
Finding broken steps
In the dashboard, broken steps are flagged with a warning icon in the flow editor. Go to the flow, open the step editor, and look for the red "Broken" badge on any step.
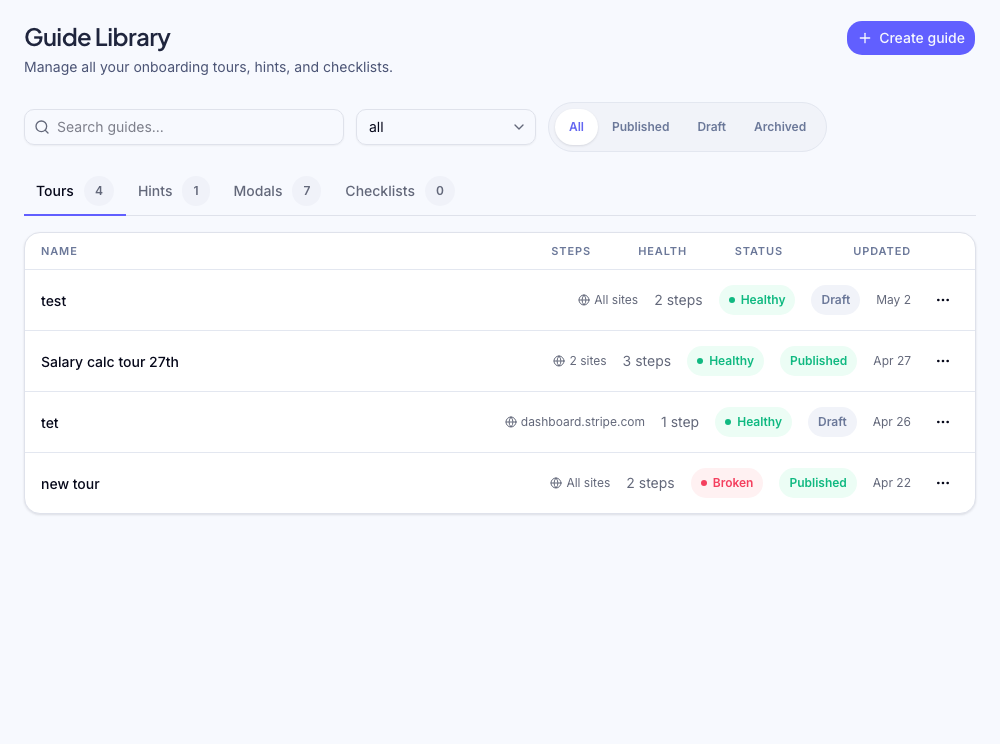
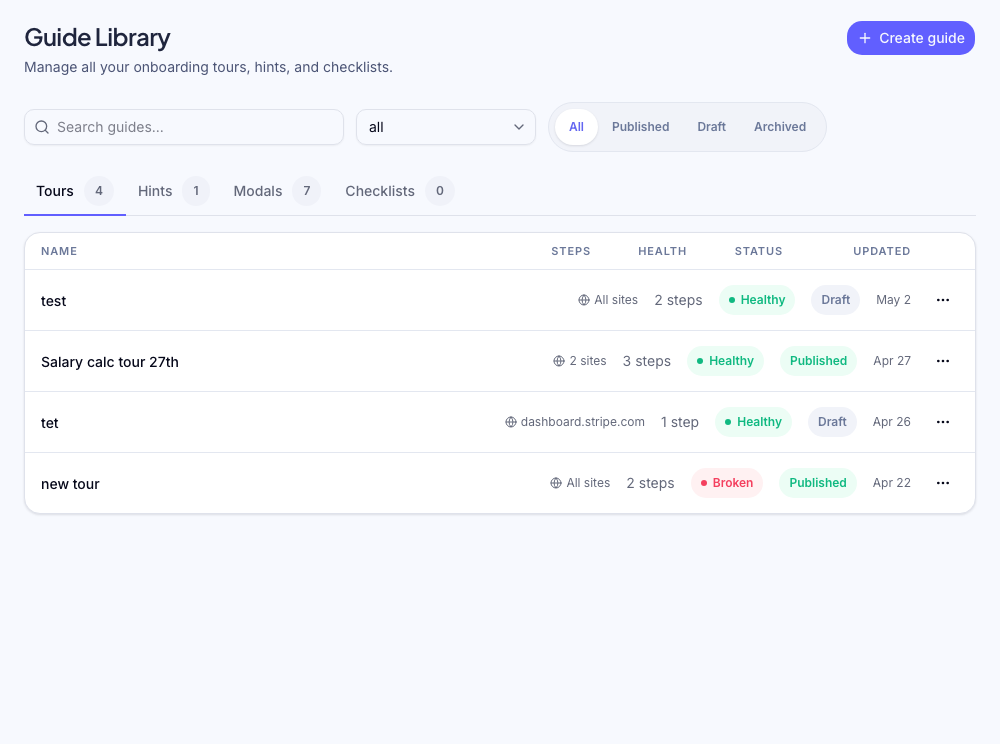
You can also see health status in the flow library — a flow with broken steps shows a warning indicator.
Fixing a broken step
Option 1 — Re-record the step (recommended)
- Open the flow in the Chrome extension (click the flow's name → Edit in extension)
- Navigate to the page where the broken step should appear
- Click the broken step in the sidebar to select it
- Click Re-anchor and then click the target element on the page
- Save the flow
This re-records the fingerprint using the current DOM, fixing the anchor.
Option 2 — Add a custom selector
If your element has a stable CSS selector or data-* attribute, you can override the fingerprint with a precise selector:
- Open the step in the dashboard editor
- Go to Advanced → Custom selector
- Enter a CSS selector (e.g.,
[data-testid="submit-button"]or#onboarding-next) - Save
A custom selector takes priority over the auto-fingerprint. This is the most durable fix — elements with stable IDs or test IDs never break.
Work with your engineering team to add data-zenstep="step-name" attributes
to key UI elements. This gives you a permanent anchor that survives redesigns.
Option 3 — Delete the step
If the element no longer exists in your UI (e.g., a feature was removed), delete the step from the flow editor. The tour will skip that step and continue from the next one.
Preventing future breaks
Use stable selectors: Elements identified by id or data-* attributes are much more resilient than those identified by class names or position.
Test after deploys: After UI changes, preview affected flows in the Chrome extension to catch breaks before they reach users.
Monitor health badges: Check the flow library after significant UI changes. Degraded steps are a leading indicator of upcoming breaks — fix them before they fully break.
Why does Zenstep skip broken steps?
The alternative — showing the tooltip at an approximate position or on a wrong element — is worse than skipping it. A skipped step means the user misses one explanation. A misplaced tooltip pointing at the wrong element confuses users.
If a critical step is broken, fix it and republish. Users who were mid-flow will restart from the beginning on their next visit.
Was this helpful?
Related articles